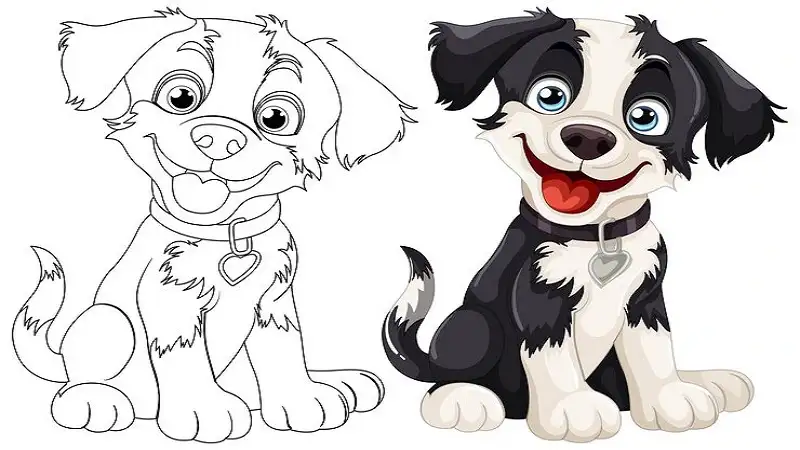
Drawing:skfktqthywc= Dog animals is a fantastic way to improve your artistic skills while also having fun. Among the many animals you could start with, dogs are one of the most popular subjects for beginners. Their loyal nature and expressive faces make them an excellent subject for both simple and detailed artwork. In this guide, we will walk you through a beginner-friendly process to draw a dog, step by step. Whether you’re just starting out or looking to refine your technique, you’ll find this guide helpful.
Materials You’ll Need
Before starting, it’s essential to gather the right tools. Having the proper materials will make the process smoother and allow you to focus more on the creative aspect.
Essential Drawing Tools for Beginners
- Sketchbook or Drawing Paper: A smooth surface is key for getting clean lines.
- Pencils: Start with an HB pencil for light sketching, and use a 2B or 4B for darker lines.
- Eraser: A soft eraser for fine-tuning details and correcting mistakes.
- Ruler (optional): Useful for keeping proportions accurate.
Optional Supplies for Adding Detail
- Blending Stumps: To help with shading and blending.
- Colored Pencils or Markers: For adding color to your drawing.
Understanding Dog Anatomy
Before jumping into sketching, it’s crucial to understand the basic anatomy of a dog. This will make it easier to capture the right proportions and create a more realistic image.
Basic Structure of a Dog’s Body
Drawing:skfktqthywc= Dog have a strong and muscular body structure. Start by studying how their head, torso, and legs are connected. The head is usually oval-shaped, while the body can be drawn using a combination of circles and ovals.
Proportions and Key Features to Focus On
Pay attention to the size of the head compared to the body, as well as the length of the legs. These proportions are key to making your drawing look realistic.
Step 1: Sketching the Basic Shapes
Start by lightly sketching out the basic shapes that make up a dog’s body. Use a large oval for the body and a smaller circle for the head. Make sure to leave enough space for the legs and tail.
Drawing Circles and Ovals for the Body
The body should be proportionate to the head. Place the oval for the body slightly below the head circle, leaving enough room for the neck.
Positioning the Head and Body in the Right Place
Make sure the head is in line with the spine, keeping the dog’s stance balanced and natural.
Step 2: Adding Details to the Face
Once you have the basic shapes, it’s time to add detail to the face. This is where your dog’s personality will start to come through.
Drawing the Eyes, Nose, and Mouth
Draw the eyes as two small ovals, positioned symmetrically on the face. The nose should sit between the eyes, slightly below the midpoint of the face. The mouth is just below the nose, with a slight curve.
How to Create Expressions in Your Dog Drawing
To give your Drawing:skfktqthywc= Dog more character, adjust the eyes and mouth to create different expressions, such as curiosity, happiness, or calmness.
Step 3: Shaping the Ears
Next, focus on the ears. Ears can vary greatly depending on the breed, so this is where you can have some creative freedom.
Different Types of Dog Ears
Some Drawing:skfktqthywc= Dog have floppy ears, while others have pointy or semi-erect ears. Choose the type that suits the breed you’re drawing.
Adding Volume and Texture to the Ears
For a more realistic look, add some light shading to give the ears depth and volume.
Step 4: Outlining the Body
With the head and face drawn, it’s time to move onto the rest of the body. Use your initial oval shape as a guide.
How to Create a Natural Dog Stance
Pay attention to the angle of the legs and how they connect to the body. Make sure the dog’s posture looks relaxed and natural.
Refining the Legs and Paws
Drawing:skfktqthywc= Dog the legs as thin cylinders and refine the paws by adding small ovals at the ends. Don’t forget to add details like claws or pads.
Step 5: Drawing the Tail
The tail is a fun part of the drawing as it can help express the dog’s mood.
Different Types of Dog Tails
Some Drawing:skfktqthywc= Dog have long, curly tails, while others have short, straight tails. Choose the type that fits your drawing.
How to Draw a Tail with Motion and Life
To make the tail look lively, draw it slightly curved with subtle lines that suggest movement.
Step 6: Shading and Adding Texture
Now that the basic outline is complete, it’s time to add texture and depth with shading.
Simple Shading Techniques for a Realistic Look
Use your pencil to shade areas where light wouldn’t naturally hit, such as under the legs and along the belly.
How to Add Fur Texture with Simple Strokes
For fur, use quick, light strokes in the direction the fur would naturally grow. This adds a realistic texture without making the drawing too complicated.
Common Mistakes Beginners Make
Mistakes are part of the learning process, but here are some common ones to avoid.
Avoiding Stiff Poses
Make sure your dog doesn’t look too stiff. Try adjusting the legs or tail to give it a more dynamic pose.
Mistakes with Proportions
Double-check that the head isn’t too big or small compared to the body, as this is a common issue in beginner drawings.
Tips for Improving Your Dog Drawings
Drawing is a skill that improves with practice. Here are some tips to help you along the way.
Practice Techniques to Enhance Skills
Start by drawing simple shapes and gradually build up to more complex drawings. Repetition is key to improvement.
Using Reference Photos for Accuracy
Having a photo of a real dog to reference can make a huge difference in the accuracy of your drawing.
Advanced Techniques for More Detail
Once you’ve mastered the basics, you can start incorporating more advanced techniques.
How to Capture Different Breeds of Dogs
Each breed has its own unique features. Study different breeds and practice capturing their distinct characteristics.
Adding Realism with Shadows and Light
Use light and shadow to add depth and realism to your drawing. Focus on where the light source is coming from to create more dynamic art.
Coloring Your Dog Drawing
If you want to add color, here’s how to get started.
Tools and Techniques for Adding Color
Colored pencils, markers, or digital tools are all great options for coloring your dog drawing.
How to Choose the Right Color Palette for Dogs
Look at reference photos to match your colors to real-life dogs. Use a range of shades to create depth in the fur and features.
Showcasing Your Art
Once you’re done, it’s time to show off your work.
How to Display or Share Your Work
Whether it’s posting on social media or framing it for your home, sharing your art can be a rewarding experience.
Getting Feedback to Improve Your Skills
Sharing your drawing with others, especially other artists, can provide valuable feedback for improvement.
Conclusion
Drawing:skfktqthywc= Dog is a fun and rewarding experience that can help you grow as an artist. With practice and attention to detail, you can create beautiful and realistic dog drawings that capture the essence of man’s best friend.